Views
Views are required to browse records and define the following three aspects:
- Which records are listed and being part of the result set.
- What information is displayed for the result set.
- How the records are sorted.
Create View
Section titled “Create View”DETAILS & FIELDS
Section titled “DETAILS & FIELDS”- On the tab Views click the button NEW VIEW in the top right corner. This will present the screen shown below.
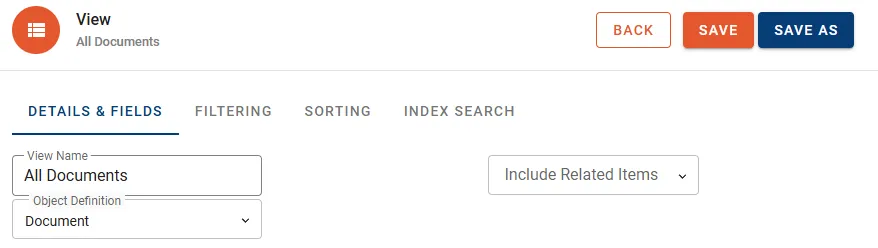
- Define a name in the View Name input box.
- Select the Object Definition to be queried from the drop-down menu.
- Optionally select the related items to be included in the results by using the Include Related Items drop-down menu.
- Select the Fields to be displayed by the View using on of the following methods:
- Instantly move designated Fields by double-click.
- Mark the designated Fields and use the arrow buttons located between the list of Available Fields and Selected Fields.
FILTERING
Section titled “FILTERING”Define filter conditions for the records being displayed.
- Click the button ADD FIELD to the right.
- Select the Field used to filter the records.
- In dependency of the Field type a specific dialog will appear to define the filter conditions. Once conditions are defined press APPLY FILTER to close the dialog.

Use the following elements to apply modifications to your condition:
| With multiple conditions used to relocate vertically by drag-and-drop. | |
| Negate this condition / group. | |
| Edit this condition. | |
| Remove this condition / group. |
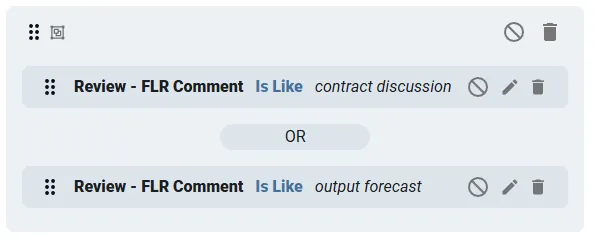
As soon as another condition is added they are automatically linked by AND. Click the box to toggle to the connecting box to OR and vice versa.
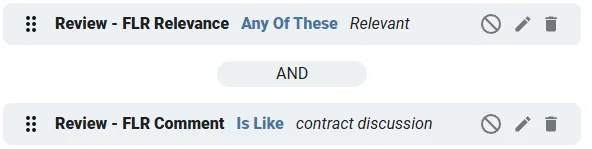
Drag-and-drop one condition over another one to create a group. Condition groups show a small icon identifying them as group and follow the principles as single conditions.
SORTING
Section titled “SORTING”- Click the button ADD SORT to select the Field for sorting.
- Multiple Fields can be added to define complex sorting conditions.
- Drag Fields to change priority with the topmost Field having the highest priority.
- Toggle the sort icon for a Field to switch ascending sort order (AZ) to descending sort order (ZA).
- Remove a Field from sort order by clicking the bin icon.
INDEX SEARCH
Section titled “INDEX SEARCH”- Click the button ADD SEARCH INDEX to select the Search Index to be queried.
- A new line is added where you can enter the term to be searched.
Manage View
Section titled “Manage View”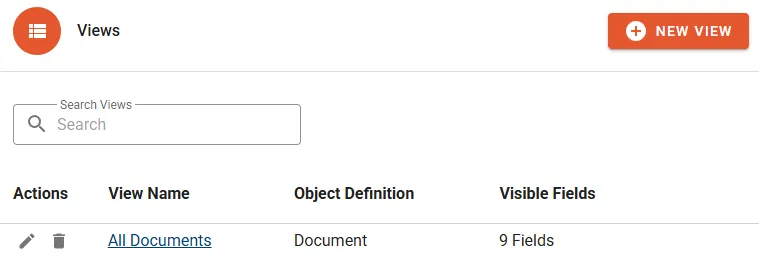
The following properties will be displayed in the View list:
- View Name shows a link to access the list of resulting records.
- Object Definition is indicating the object type the View has been created for.
- Visible Fields is the count Fields added for display.
Actions
Section titled “Actions”- Edit to change the View name or properties.
- Delete to permanently remove the View.
Details
Section titled “Details”Entering a View does show the list of resulting records.