Users
Each individual requires a personal User account in order to access Farsight. The User name is tied to the email address of the individual.
New Users can be created directly or invited for self-registration by administrators.
- Creating User accounts requires knowing the full name and specifying a default password.
- For this reason the Invite option might be the preferable way unless sending emails is not permissible e.g. in air-gapped environments.
User accounts must belong to a Client and can optionally have multiple Client assignments.
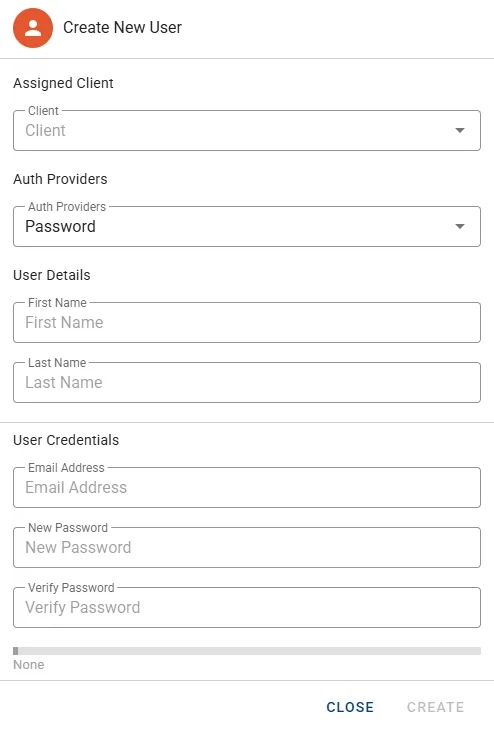
Create User
Section titled “Create User”-
In the Users tab click the button CREATE USER in the top right corner.

-
Optionally select the Client to be assigned in the drop-down menu Assigned Client.
-
Select the applicable Auth Providers for the new account. The drop-down menu allows multiple selections.
-
Enter the User details:
- First Name
- Last Name
-
Enter the User credentials:
- Email Address
- Password & Verification
Invite User
Section titled “Invite User”This feature offers self-registration capabilities to which Users can provide their details.
- Press the button INVITE USERS to open the invite dialog.

- Select the applicable Auth Providers for the new account(s):
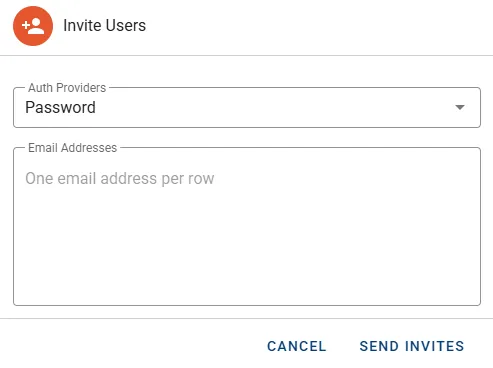
- Provide a single or multiple email addresses to the Email Addresses input box.
- Press the button SEND INVITES to notify Users about their invitation.
For each provided email address a new User account is created instantly. These accounts will show Pending Invitation on Name while registration steps have not been completed. Nevertheless as an administrator you can already assign designated Groups while registration is pending.
Manage User
Section titled “Manage User”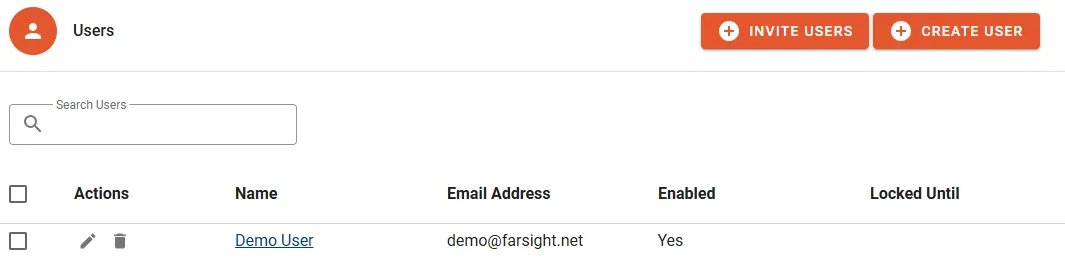
The following properties will be displayed in the User list:
- Name is the full name of the User.
- Email Address the User is registered to.
- Enabled does show true if the account is active and enabled for login.
- Locked Until will show lock period in minutes e.g. when the User was locked out previously because of too many failed login attempts.
Actions
Section titled “Actions”- Edit the properties like email address, name or change the password.
- Delete does permanently remove the account.
- Enable/Disable allows you to suspend access and any active sessions by the user will be immediately terminated.
- Manage Groups
- Manage Auth Providers
- Manage Clients
Details
Section titled “Details”Assigned Groups
Section titled “Assigned Groups”The GROUPS sub tab lets you manage Group memberships for the User.
- Click the button MANAGE GROUPS to configure assignments.
- Change the Group memberships by selecting/unselecting designated Groups.
- Click the button CONFIRM to complete the change.
Assigned Providers
Section titled “Assigned Providers”The AUTH PROVIDERS sub tab lets you manage permissible Auth Providers for the User.
- Click the button MANAGE PROVIDERS to configure assignments.
- Change the Providers assignments by selecting/unselecting designated Providers.
- Click the button CONFIRM to complete the change.
Assigned Clients
Section titled “Assigned Clients”The CLIENTS sub tab lets you manage Client associations for the User account.
- Click the button MANAGE CLIENTS to configure assignments.
- Change the Client memberships by selecting/unselecting designated Clients.
- Click the button CONFIRM to complete the change.