Overview
With Workspaces you can segregate your data into meaningful data buckets and work environments. There are no specific rules as the level of segregation does follow individual needs. Here are typically observed patterns:
- Single Workspace representing the entirety of a specific project or legal matter.
- Multiple Workspace covering individual aspects of single project or legal matter.
- Single Workspace covering multiple projects or legal matters.
Read the section below for more insights about organizing project data.
Workspace considerations
Section titled “Workspace considerations”Single Workspace
Section titled “Single Workspace”- Most projects will start with a single Workspace for a project or matter. Additional Workspaces can still be introduced later as the project develops.
- All required data is loaded into one Workspace as a central repository. The data can easily be made available to the designated Groups and incrementally added to the defined workflows.
- Workflow tailoring is performed at the individual Workspace level and not being shared with other Workspaces. Managing the same workflows across multiple Workspaces can be time-consuming.
- Well established complex workflows could be a reason for placing data of different projects into a single Workspace. While this approach is typically not recommended it could be a viable option if segregation of storage and user access is expendable for the data in scope.
Multiple Workspaces
Section titled “Multiple Workspaces”- Access management and segregation is more distinct at Workspace level. If you want to present the Documents to a less privileged user base or a counter party then a separate Workspace might be suitable.
- Workspaces are handled as a unit when it comes to archive. It is not reasonable to archive a Workspace before all work is completed which might be a reason to branch certain aspects if they are expected to settle at different points in time.
- Large litigations might consist of sub-issues involving different parties and data sets. In such scenario it could make sense to branch the matter into dedicated Workspaces when correlation of data and workflow is low.
Create Workspace
Section titled “Create Workspace”- Navigate to the tab Workspaces in the administration section.
- Click the button CREATE WORKSPACE in the top right corner to open the corresponding dialog.
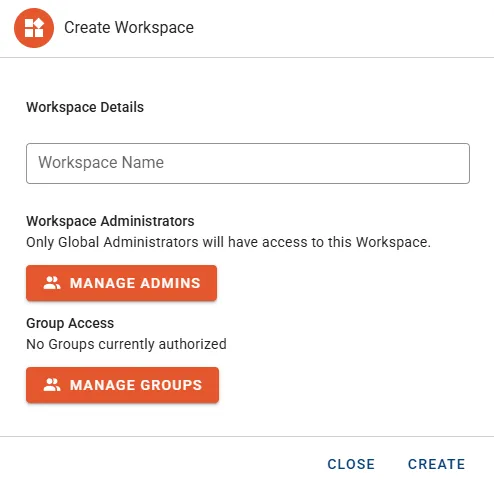
- Enter a name for the new Workspace into the Workspace Name input field.
- Optional: Press the button MANAGE ADMINS to promote selected Users to Workspace administrators.
- Optional: Press the button MANAGE GROUPS to associate existing Groups with the Workspace.
- Click the button CREATE to submit the information and start Workspace initialization.
Manage Workspace
Section titled “Manage Workspace”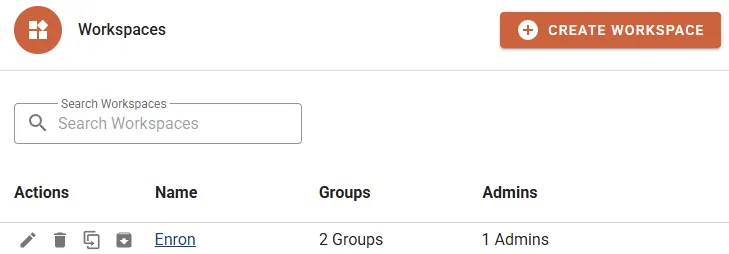
- Name
- Groups shows the count of connected Groups.
- Admins shows the count of Users configured as workspace administrators.
Actions
Section titled “Actions”- Edit allows renaming the Workspace and modifying associated administrators or Groups.
- Delete will permanently remove the Workspace from the environment. Consider creating an Archive before deletion.
- Clone will create an exact copy of the Workspace including all data.
- Archive is used to write the Workspace into a portable archive file. See section Archives for more detailed information.